Table of Contents
SHARP MZ-800 Emulator for Windows by Zdeněk Adler
This is not official documentation/help page for this emulator.
Sources:

Basic Overview
Emulator (mz8emu) is an application for Windows that allows you to run applications and code for a computer of SHARP MZ-800 model range and work with a large number of devices that were used with this computer.
Emulator is designed not only for ordinary users who like to remind their computer history, but also for programmers, as there is integrated line assembler, disassembler, debugger and other tools which allows you to develop and debug programs on your PC.
Minimum System Requirements
The minimum requirements to run the emulator is a PC running at least Windows 95, 98, ME, 2000 or XP. It is not functional under Windows NT. Furthermore, it should have DirectX installed correctly (at least version 7), a sound card is an advantage but is not required.
For optimal performance PC with at least 600 MHz processor or higher is recommended and good AGP graphics card. Content of the SHARP ROM (or so called firmware) is also required as it is not directly bundled with emulator. If you're the real owner of MZ-800, you can download it, or get content directly from your computer using an EPROM programmer.
Emulated Hardware
All SHARP's hardware is emulated as follows:
- Z80 CPU with precise timing including undocumented instructions
- Graphics Processor GDG - emulated using the screen scanlines, the possibility to choose 16/32 kilobytes of videoRAM, all graphics modes emulated, including two undocumented (3 and 7)
- Z80-PIO, 8253, 8255
- Sound - all 3 channels + 1 noise of PSG emulated (white and synchronous noise) + one channel from 8253, all in the 44100 Hz, 8 bits quality
- Floppy disk controller compatible with WD279X, floppy disk drive emulation using image MZ-emulation * IDE (8-bit interface for connecting hard disk), viz. more text.
- Quick drive MZ-1F11 including controller
- Tape drive as virtual device
- Ramdisk with power backup (compatible with the original) up to 1 MB or 512 kilobytes Pezik (without power backup)
- Printer color / black / green screen
- Mouse Emulation
- Four-color plotter MZ-1P16
Emulator's License
The emulator is shareware, where the unregistered installation of the emulator is limited for 3 minutes run. Upon expiration of this time the emulator terminates itself and you must start it again. Unlike the full version there are also blocked buttons to save / load emulator states (snapshots) and it will display startup information dialog every time. Primary purpose of this demo mode is to allow you to check whether the emulator will work properly on your PC without any troubles.
Price, Payment Methods
Registration fee is 150 CZK (or 10 US dollars) and can be paid either by electronic payment or by postal order at the post office. This price includes free updates - ie registered user gets the possibility to download a new version of the emulator from the internet without the need for new registration. Method of payment from abroad customers is determined by mutual agreement. For registration related and further information contact the emulator's author via e-mail : zdeneka@seznam.cz.
Registration Process and Terms
After receiving an e-mail with a request for registration an information needed for payment of registration fee will be sent you back, like the account number and a constant symbol. After payment please send a copy of proof of the payment via e-mail (or information, about date in which was an electronic payment acknowledged and under what variable symbol), the name and surname of the buyer and the home address (these data are not collected or used for other purposes). On the basis of the received payment registration key will be generated and immediately sent to you (in ZIP archive). After receiving the key just unzip it to any folder on your hard disk (it's recommended to use the same folder in which you have the emulator). Then run the emulator which will displays the registration screen - continue pressing the Register button (on the right side) after which the dialog for opening the file will appear. Select the correct path to the folder in which the registration key is stored (file with .reg extension) and double click it (or select it and click open) to activate the full version of the emulator. Subsequently, a window a successful registration will be shown, which also includes your registration information. After this step it is still necessary to terminate and restart the emulator.
How to Install New Version
You should download emulator only from author's website http://mz-800.xf.cz/download.htm.
<wrap important>It is strictly prohibited by the author of this emulator to upload it to other web sites.</wrap>
Emulator is distributed as a ZIP archive that contains the executable application files and other information, but does not contain ROM files. You have to download them separately because of possible conflicts with SHARP Corporation demands (this may change in future versions).
Installation is done by extracting the file into the appropriate folder - for example, you can create a folder named “MZ-800 Emulator” in the folder for Windows programs (“Program Files”). Depending on the version of the operating system it might be necessary to have administration level credentials to install / run programs. When you start the emulator for the first time, it creates configuration files and attempts to associate MZF, MZS and DSK file types. This behavior can then changed in the settings dialog in the emulator.
If you are upgrading the application on the same computer where you have already registered the older version, it is sufficient to download shareware version from the Internet and overwrite mz8emu.exe with the new version. Your registration information will be retained.
In case of installation on another computer you need to repeat the registration process.
Basic Work With Emulator
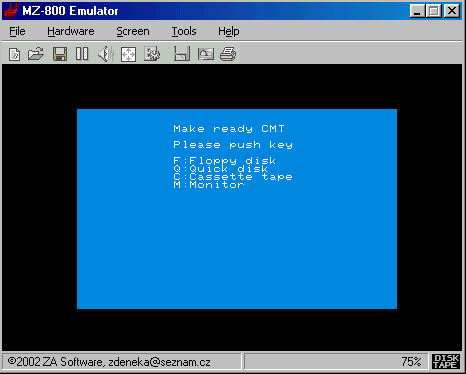
After running the emulator switches to the same mode as in which there is a real emulated computer. Depending on the connected devices specific operating system is loaded or there is available basic menu with the following options:
- M - Enter monitor mode
- C - Load and run the file from tape
- Q - Load and run the file from quickdisk drive (if QD drive is connected)
- F - Load and run the file from floppydisk drive (if FDD drive is connected)
The most common first step is to load and run/execute the selected application from some device that is available.
Loading Files From Cassette Tapes
Emulator provides two ways to retrieve files from tapes.
Fast File Loading
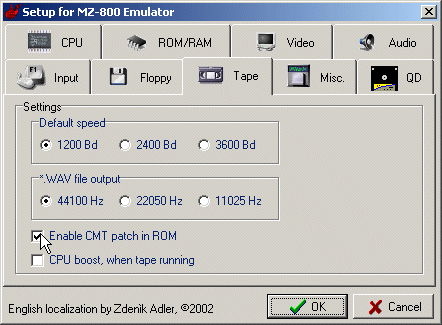
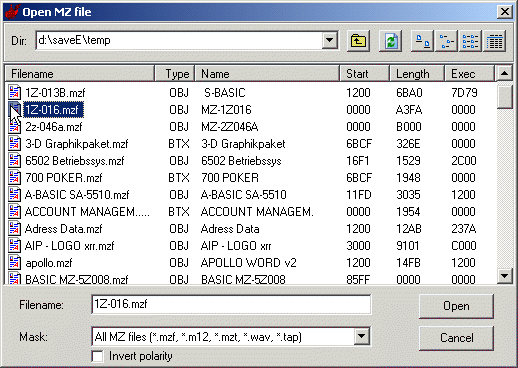
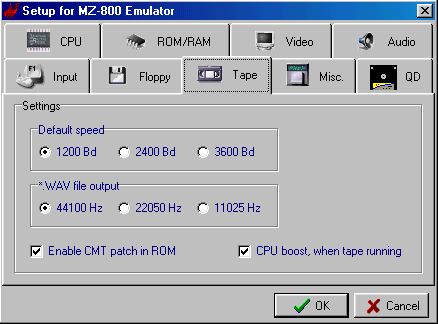
Emulator by default associates files for MZF quick start. It is also possible to open files using fast loading in the running emulator (MZF is loaded directly into memory), if there is option in the settings Hardware / Setup / Enable Tape CMT patch in ROM enabled.
In this case, the boot-time by pressing the C key or L command in monitor mode brings up the following dialog screen that allows you to select a file to load:
Loading Files Using Virtual CMT
If the option “CMT patch in ROM” is disabled, or application does not read data using monitor routines, data are expected to be retrieved from the virtual tape. This behavior is typically for programming languages such as BASIC and multipart cassette games. Virtual tape window can be opened from the menu Hardware / Virtual CMT or from cassette icon on the panel.
For this to work, you have to press Open button to select one or more MZF files and press the Play button to start data transfer to the emulated system. The state of the loading process is shown as green stripe and a time stamp.
Loading Files of the Floppy Drive Type
Emulator allows you to work with floppy disks stored in a format created using DSK CPDREAD 3.24 (see download section) where the contents of each disk is saved as a single large file (360 kB 720 K, 1.44 MB). These files can also be copied back to disk using CPDWRITE 1.03 (again in the download section).
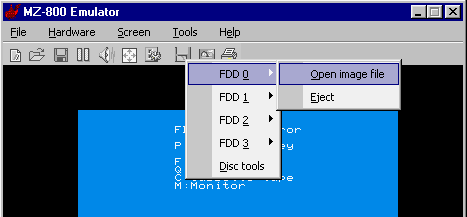
If the *.dsk files are associated with the emulator (optional in the Misc Setup tab), then you can just double click on the DSK file - emulator will start and automatically switches to emulate FDD into the drive A: and “insert” the DSK file in it, and attempt to boot from id. If you want to change the DSK file on the fly, there are two ways: first is to use the toolbar when clicked on the floppy icon to expand popup menu, where you can either change the DSK file in the drive (Open image file) or remove it completely from the drive (eject).
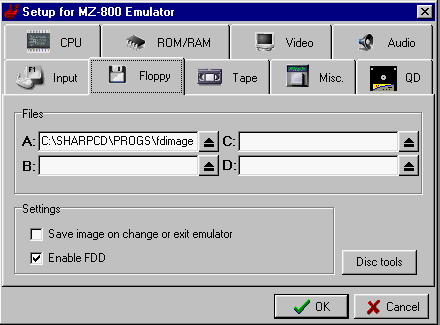
Similar settings can also be done from Setup. There is also another option to enable / disable saving the image during closing the emulator, or to swap floppy disks (Save image on change or exit emulator). It is possible to entirely enable or disable the FDD controller emulation (Enable FDD). The last option on this panel are tools for working with disk images (Disc tools), but will be described in a separate chapter.
Loading Files of the Quickdisk Type
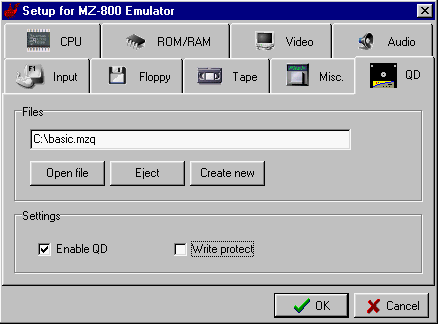
Emulator supports opening QD media in Setup dialog in QD tab. To open an existing image use the “Open file” button and the device itself need to be allowed, which might eventually effect after the next reboot of the emulated machine.
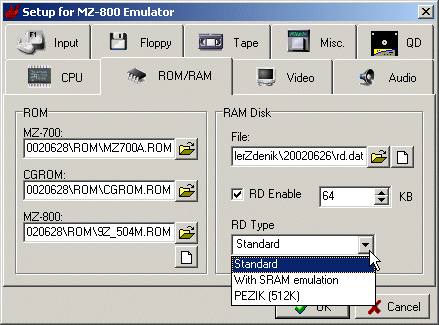
Loading Files from ramdisk/romdisk/cartridge
<wrap todo>TODO: Ramdisk</wrap>
Emulated Components
Processor
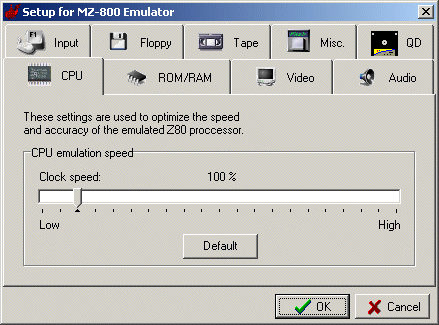
The Zilog Z-80 processor is properly emulated including expansion instruction sets. In the settings you can change the processor speed, when you need to speed up or slow down program execution:
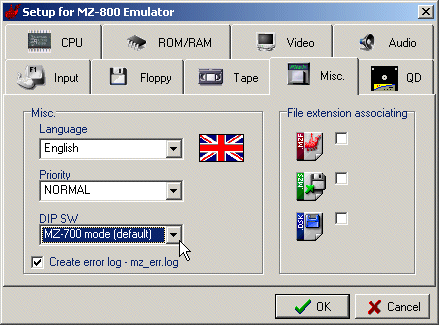
Basic mode can be also affected by setting of emulator's priority and changing the emulator mode switches (DIP switches) in “Other” settings tab, where there is also an option to select language for application and file associations in the operating system.
Screen
Almost all the known abilities of the graphical chip GDG are emulated and also some partly undocumented modes. The image is drawn through the scanline simulation, ie. the beam running the TV screen including can be backward runs, etc. and also includes rendering of the screen edge (border) in the same width as in the real MZ-800. This should allow to properly render all the graphically demanding programs that require precise timing (for example slap Fight from JO, GP Simulator, Picture Show, Sound FX 4, Game music, MogMog2, the Interkarate loader + and many others…). It can work both in the basic configuration with a 16-KB videoRAM and with videoRAM expanded to 32 KB.
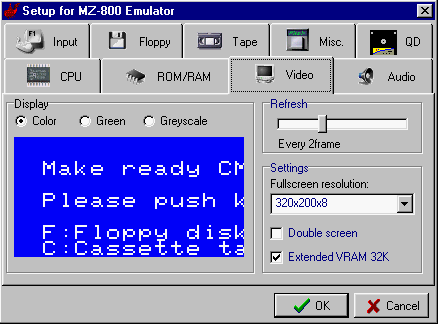
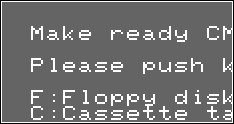
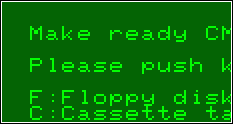
You can select the screen type to be simulated monitor. A choices are color and monochrome monitor in shades of gray, or green.
Another possibility is the so-called frame dropping, which may partly help owners of slower computers (Refresh every 4th frame only). This is more or less about that rendering SHARP's screen must be done 50 times per second, while if we use dropped frames, it can be reduced to 25, 17 or 12 frames per second. The more frames is dropping, the more there may appear “jerky” movements such as game-characters in games, scrolling text, etc. If you have sufficient PC performance, it's recommended to move slider set to “Every 1 frame” to get most realistic emulation.
There is also an option for the full-screen mode. It is recommended to use the highest possible resolution or native resolution of your monitor respectively - this will ensure adequate image quality and its proper spread across the screen. Higher color depth on older computers may slow down rendering. Set depth to 16 bits can improve the rendering, but might require additional graphics card mode switching.
The last settings, see the “double screen” item which toggles between normal and double resolution mode and with “Extended VRAM 32K” you can enable / disable the emulation of expanded videoRAM memory - it is recommended to keep this option always on.
Keyboard and Mouse
The following table shows the mapping of some special keys which might be hard and time-consuming to find. Most other keys are mapped to similar places where they were on SHARP. Beware, however, that for example on the MZ-series the plus key was SHIFT-variant of the semicolon key…
| Key on MZ | Key on PC |
|---|---|
| ? | F8 |
| BREAK/ESC | End |
| DEL | Backspace |
| INST | Insert |
| TAB | TAB |
| GRAPH | Caps Lock |
| ALPHA | \ |
| BLANK KEY | ~ |
| @ | F6 |
| \ | F7 |
F12 key is of particular importance, as it causes a reset of the emulator. You can also use CTRL + F12, just as it was possible on SHARP to press CTRL + RESET to restart some programs.
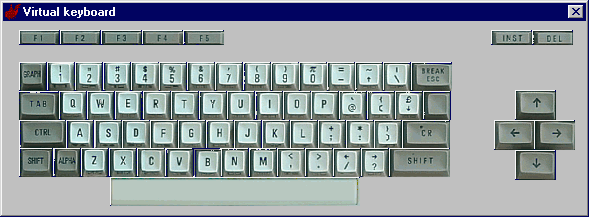
Emulator also has a virtual keyboard, which may help you to find and press a specific character, number or letter. Represented by a thumbnail picture of a real SHARP's keyboard, where you can press the keys with the mouse. Pressing multiple keys at the same time can be achieved by holding down the Shift key (on the PC keyboard) and then pressing the buttons to be pressed simultaneously. When you release the Shift key on the PC keyboard it will also release simultaneously held keys/buttons.
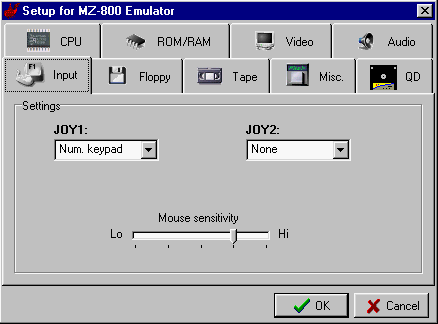
The mouse is emulated by a Tatra software's specification that comes from the (ing. Jan Koštial) - it was a classic Atari parallel mouse connected via joystick port, and has worked with many programs and games - such as Lemmings, MZ Paint 4, Return to Kyrandia, Solitaires, POOL mouse, HD Setup and more… It's emulated using the default PC mouse (or other pointing device). The setting is typically set to the port JOY2 where mouse was usually connected in supported applications. If a program or game expect regular joystict on the same port connected joystick instead, it can lead to unusual behavior. Mouse emulation suppresses unpleasant phenomenon, which manifested itself on SHARP - if you're pushing the mouse very quickly in one direction, the cursor started to move in the opposite direction. If this phenomenon manifests itself after all, try to correct mouse sensitivity using slider in the “Mouse sensitivity” Setup dialog.
The remaining options in the setting is what is connected to the JOY1 and JOY2 ports. You can choose either a mouse, simulated joystick using the numeric keypad (keyboard 4,8,6,2 + 5 fire) or the option to indicate the unoccupied port. The default JOY1 port is simulated using the joystick on num. keyboard and JOY2 port is not occupied (None).
Cassette Tape
Cassette tape is emulated in two ways - either by modifying the ROM, or as a virtual tape device.
Modified ROM mode serves primarily to load programs only after powering on the emulated system (or after reset), press “C” key or run “L” command from the monitor, as it works only in programs that calls monitor loading routines. Modification is done on the following two addresses:
04D8h - Load head
04F8h - Load program
The “load head” routine adds emulator OUT (01h),A instruction, which takes care of displaying a dialog for selecting files and loading MZF file header into memory. Into “Load program” routine there is added OUT (02),A instruction which loads the body of the selected program. It is possible enable or disable the whole modification in the ROM in the setup by selecting the “Enable CMT patch in ROM”. After activating this setting it is necessary to reset the emulated computer.
Virtual Cassette Tape (virtual CMT)
It serves as a almost full replacement for traditional tape recorder connected to SHARP. It supports not only MZ formats (*. MZF, *. M12), but als the format of the ZX Spectrum (*.TAP) and a universal audio format (*.WAV) in 8-bit MONO format with any sampling rate without compression.
You can open virtual CMT dialog either from the toolbar or from Hardware→Virtual CMT menu. Instead of inserting the cassette you have to select file (one of the above types) using the Eject button. Then you only need to prepare the program that expected data from the tape and press Play. This way it is possible to load multi-part cassette tape games. For example Interkarate+ game, which has a total of 3 parts (loader, image, main program):
Speed of the virtual CMT corresponds to the speed on the original computer. Approximate time to the end of the recording is displayed in the Virtual CMT. If you do not want to wait so long, it is advisable to set a higher speed of emulation, which can significantly shorten the recording time.
Floppy Disk Drive
The emulated floppy disk drive controller compatible with the Sharp ROM circuit equipped with WD 2797 chip and up to four drives, currently up to 720 kilobytes per disk. Floppy drives are not emulated by the PC drive, but using the disk image.
Quickdisk Drive
The emulator provides full support for QD drive (read, write, format), its image format is compatible with other emulators. Compared with real media (QD media was double-side), it is necessary to have one quick disk image for each side. To open an existing image use “Open file” button, to eject disk from the imaginary unit there is “Eject” button and if you need to create a new unformatted disk use the “Create new” button. QD emulation can be enabled using “Enable QD” checkbox. You can prevent write access to disk by checking the “Write protect” option.
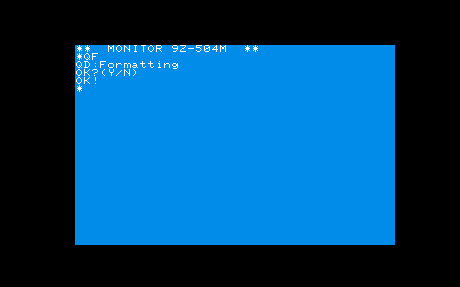
Following example describe use with pre-loaded software support in the SHARP ROM memory. After creating a new image, it needs to be formatted before use. To do this, use “QF” command in the monitor.
Loading a program from tape to disk - QX
Disk directory listing - QD
Loading the program - QL
Save a block of memory to disk - QS
Ram Disk / Rom Disk / Cartridge
Sound Generator
It is fully emulated - 3 tone channels and 1 noise (SN 76489AN chip). The noise generator is done exactly as the original, it emulates both white and synchronous noise. It's all in the 44100 Hz, 8 bit mono quality. The sound should be sufficiently clean and of high quality on a faster PCs (> 500 MHz).
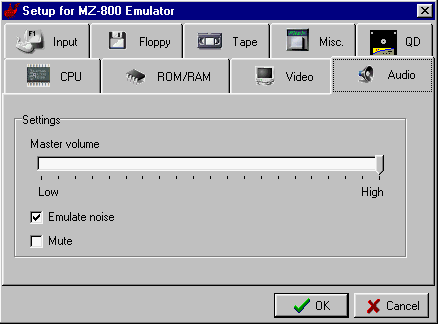
Setup is quite simple - it is possible to control the volume of audio output (mixer does not affect Windows). To achieve highest quality its I recommend to have this element set to maximum - otherwise they might lose tones with low volume. It is also possible to mute the sound completely with “Mute” option or by clicking the speaker icon in the main toolbar. There is also separated option to mute noise generator only (“Emulate noise” option).
Printers
Plotter MZ-1P16
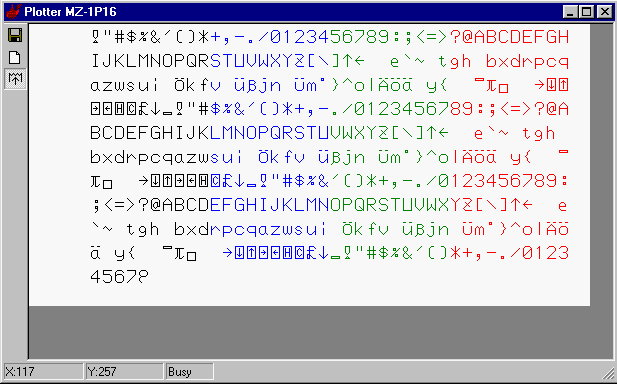
This widely used plotter was an original accessory available from SHARP Corporation. It is also fully emulated while printed output from it is not passed directly to the printer (or connected plotter itself), but the bitmaps (standard *.BMP format, 16 colors) which can be then either edited or directly printed. For this plotter single-chip processor is directly emulated including a program that is found in the plotter, so the printouts should exactly match the original output. It is even possible to run plotter hardware self-test, which we'll get later to…
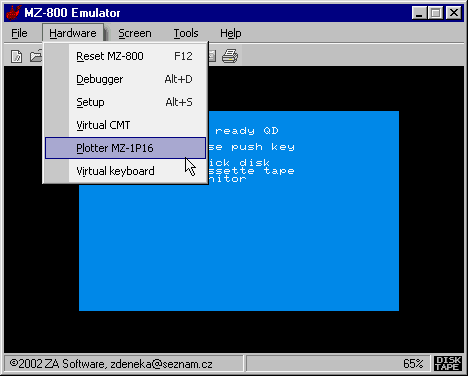
Simply run the plotter emulation - either from the Hardware→MZ-1P16 Plotter menu, or in the main toolbar by clicking on the icon of the printer. ATTENTION - plotter is emulated only if its window is open (not necessarily active). Once you close its window, it will look like it was turned off and the programs will not detect/work with it!
This brings us to describe the plotter window - it's located on the left toolbar, where are following buttons (ordered from top): The first is to store a bitmap representing the paper in the plotter to a file - it is possible to print this file in any graphics program to any printer working with Windows. Another button can reset plotter (plotter processor) - it will switch everything to the default state, if you did not save the contents of “paper”, it will be deleted. Last button is the “Paper Feed” to scroll the paper - note that this button acts as a switch, ie. that if you want to move a piece of paper, you must press the button 2 times. To run plotter self-test mode, you must first press the “Paper Feed” and then press the reset button - then plotter will begin printing its entire character generator set in four colors. On the very bottom of the window there is located toolbar with data on an XY pen position and whether it is currently executing any plotter command.
Harddisk
<wrap todo>TODO: It is emulated (?) 8/16-bits IDE disks according to specifications…</wrap>
Debugger
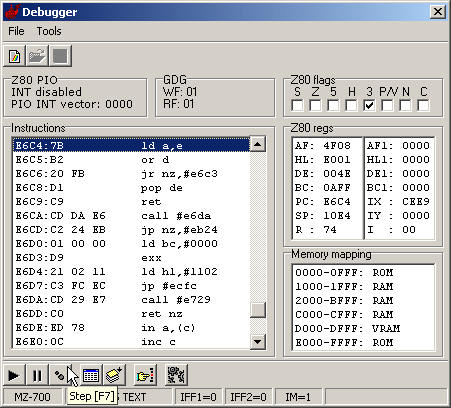
Emulator provides an integrated debugger tool designed for debugging Z80 architecture processors. Debugger can be used to trace your programs written in machine code. The debugger window shows the current position and continuously disassemble instructions (disassembling), shows the current state of processor registers and flags (CPU flag).
Currently running program can be paused, run-time debugged using the buttons and contents of the registers and status flags can be changed any time. The value of registers can be changed by double clicking and entering new values into the input line. Flags can be changed by checking the boxes.
In the debugger you can use the following keyboard shortcuts:
| Key | Function | Description |
|---|---|---|
| F7 | Step | single instruction execution |
| F8 | Pause | pause the program |
| F9 | Run | run the program |
Memory and Stack Dump
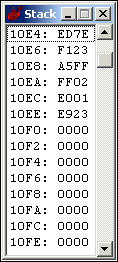
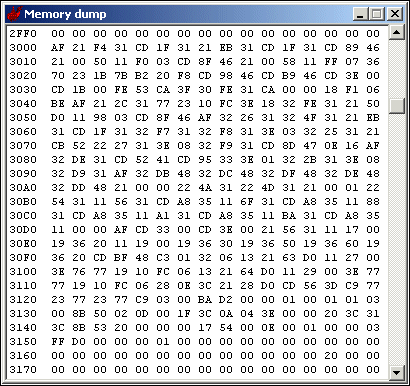
There is a window to list the content of memory and also a window to list the current state of the stack. You can see only current mapping of content of addressable memory within range available to the processor $0000 to $FFFF.
Breakpoints
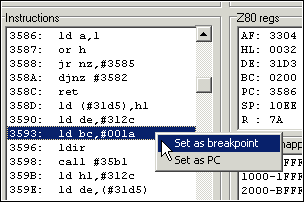
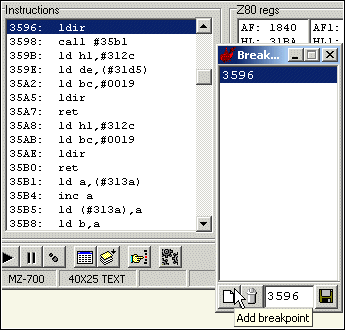
You can set multiple breakpoints in which instruction execution stops before executing the next instruction at the memory.
Breakpoints can be set in two ways:
In the debugger window, you can set a breakpoint by right-clicking on the specific instruction in the list of instructions.
Another option is to directly edit the list of breakpoints and insert there a new breakpoint by entering a specific location in memory.
Integrated Assembler / Disassembler
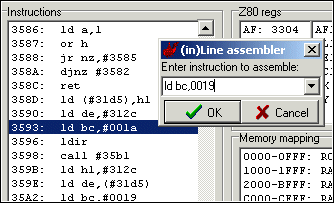
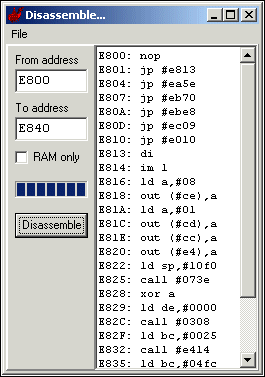
Debugger allows you to perform both normal (assembling) and reverse translation (disassembling) of the processor instructions.
You can change any instruction in the list of instructions. Just select it and type its name into the input box that appears after pressing the first key.
It is also possible to load a text file and perform its translation into machine code at a specific location in memory and you can also save re-translated code as a text file.
Loading and Saving MZF Files
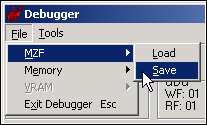
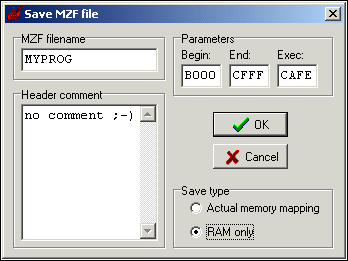
You can also load and save memory space as MZF files. Following procedure allows you to load programs or data into other memory address than the one stored in the header of the file.
After selecting the file to load it is possible to change the target location in memory where the data is stored and possibly choose for storing smaller part of file only.
To save you need to enter address ranges and address of the start of execution, then the header is also advisable to specify a file name and optionally a comment.
It is also possible to load into memory from any file as binary data without header.
Tools
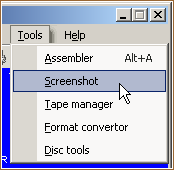
Format Convertor
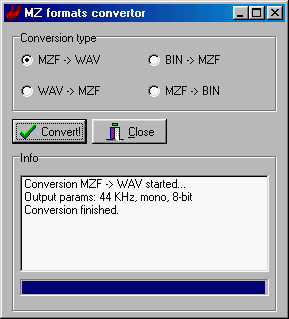
This tool allows you to convert files between MZF, WAV and BIN formats. It is available from the Tools menu → Format converter. The most common use is probably a two-way conversion between MZF ↔ WAV, which can be used to transfer programs from cassettes to PC but also to play-back it directly to the MZ, or back to tape.
Disk Tools
It serves for better and more comfortable working with disk images. It provides the following functions:
Disc Structure
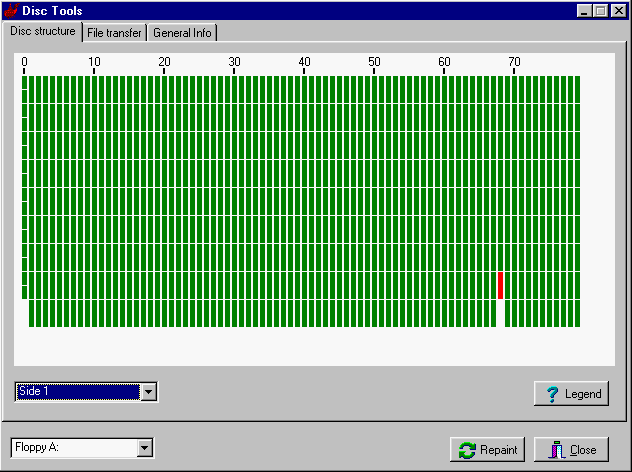
Graphical browser for the distribution sector on a floppy disk, with different color for bad sectors, or unformatted space. To show / hide information press “Legend” button. If it is a double-sided floppy disk, you can choose to display zero or first page using Combobox on the bottom of left side. Underneath it there is selection combobox for displaying a floppy disk in drives A: - D:
File Transfer
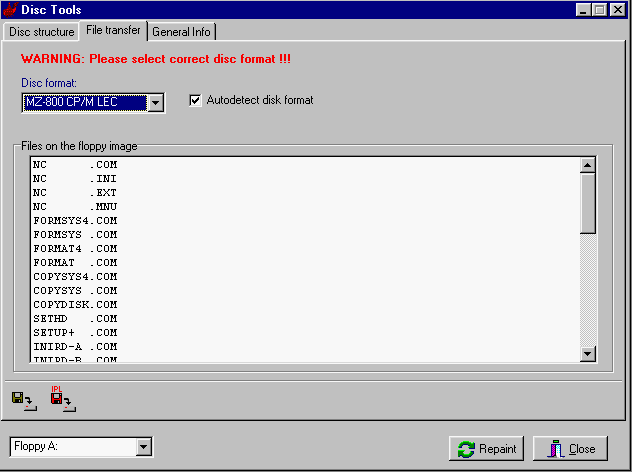
It is designed not only to extract individual files from a floppy disk image, but also to extract the boot loader. It detect three basic formats of floppies on MZ-800 so far, and CP/M LEC, the original P-CP/M 80 and DISK BASIC. If you do not want to detect format automatically, uncheck “Autodetect disc format” option. The actual extraction of files is done as follows: a standard way to indicate the files you want extracted from the image (you can select multiple files at once if you hold the Shift key or Ctrl) and press the disc icon in the bottom toolbar. Thereafter the emulator displays the standard dialog box for each item to save the extracted file, where you have can edit the file name. The emulator automatically replaces all characters that are not allowed as the name of the file in Windows as the character “_” (underscore). You can extract the bootloader by pressing the red disk icon labeled IPL. Transferring files back into the image will only be possible in future versions of the emulator.
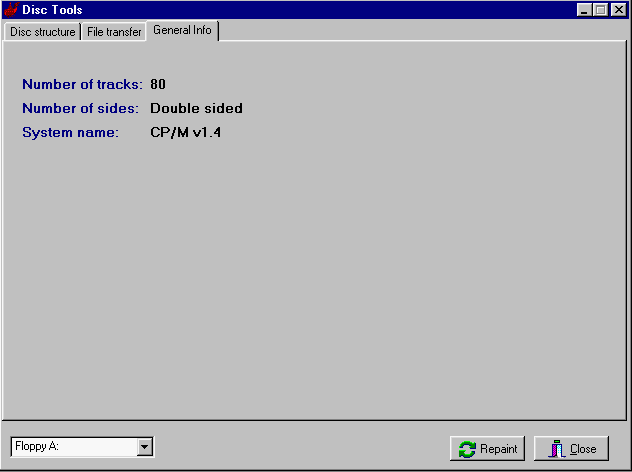
Floppy Disk General info
* Show number of tracks and the disk sides. If the disk is bootable, it displays the name of the system. Otherwise, it only shows three question-marks.
Screenshot
Version History
Version 0.097 news (29.3.2006)
An unpublished and precompiled version on disk found by the author after a long time. The project will be continued next.
Version 0.096 news (19.6.2003)
No news available.
(Note: The copyright screen shows incorrect information for this (last?) version: URL and version number.)
Version 0.095 news ( beta test version )
- New design of the virtual CMT
- The emulator supports the floppy HD drive A: if the 1.44Mb floppy disk inserted contains one or more DSK-formatted files.
- errors of the PIT 8253 emulation corrected
- Japanese language support in progress (unfinished)
Version 0.092 news
- The emulator supports drag & drop for MZF- and MZS-files
- code optimizations which improve the emulation speed
For a complete listing of the history of the emulator visit:

